Tuesday, December 11, 2012
Sunday, September 2, 2012
Step 5: Pouring the foundation
I have not posted this part yet, because I have not figured out how to get my pics from my new cell phone ;) hopefully soon
Thursday, August 23, 2012
Step 7: Making the Frames - only pics
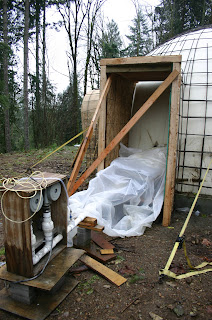
The dome will have 2 doors, one opening up into a mudroom, one connecting to the second dome. The dome will have 2 small windows of 2' x 3', one in the bathroom and one in the kitchen, both will be under the loft. There will also be a large window of 4' x 5' centered in the living room and a skylight of 2' x 4' to look through from the loft and to open for airflow and heat release. Please see this video for the framing video
Wednesday, August 22, 2012
Step 6: Setting up the airform - only pics
List of Materials
90 degree clamps (to tie down the airform to the concrete)
1/4" - 1-1/4" concrete anchors - 2 boxes (to tie down the clamps)
2 buckets of sand
roll of cellophane
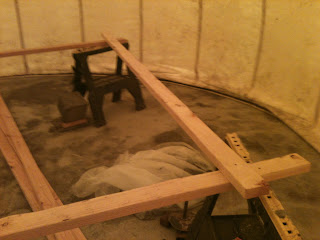
4 saw horses (inside to keep up the airform)
4 x 8 ft (2x4) (to go top of the sawhorses)
metal jig saw blade(s)
3 - 14' (2x4) to make the connection for the scaffolding
2 x 8' (2x4) to stabilize the 14' triad
2 clamps to tie down the enterance of the airform (with a 2x4)
2 clamps (as for pipes etc.) to tie down the airforms air entrance to the pipe of the inflator
chalk in bright color to mark the openings on the concrete
clamps to tie down the 14' triad to the concrete
List of tools
Rotohammer
cordless screw driver
skill saw
jigsaw - cordless or wired
rotating scaffolding
inflator pump for the airform
measurement tape
level
hook iron
Before attaching the airform to the foundation it is important to mark the measurements of all your doors, windows and pipes for utilities. It would be harder to determine this once the airform is up and you have to determine that on the outside. Make your markings inside and mark all the way to the side of the foundation, so it is easily seen once the airform is up.
Determine the exact center by measuring the whole circle twice and finding the line where the measurement is your exact diameter, where these lines intersect is the center. Mark also your walls if you are planning on them.
Subscribe to:
Comments (Atom)


